

If you need the materials and cutting list click on over to here and then come on back. If you've followed any of my tutorials or sew-alongs before, you'll know that I'm wordy and use a lot of pictures. And if you haven't...well, I guess now you know that, too. I make every attempt to be precise with my instructions so you'll be successful right out of the gate, but if you get hung up somewhere or if I'm being unclear please let me know and I'll try to clarify things better.
Have you got your goodies all together?

The pink is for my straps, the black and white is my lining, and the cassettes are my exterior.
Start with your exterior fabric. Cut one piece that is 22 inches wide by 24 inches long. From your interfacing cut a piece that is 24 inches long (and it should be by the width of 20 inches). You'll notice that you're about 4 inches short, so cut a piece that is 24 inches long by 4 1/4 inches wide. Fuse those pieces to the wrong side of your exterior piece. You'll have a little bit of overlap, like this, which is fine (and preferable to a gap).

Cut a piece of fusible fleece the same size as your exterior (this should be wide enough that you can cut one piece). Fuse this to the wrong side as well. Set this aside to cool (if you don't give the adhesive time to set you'll get bubbles). While you're waiting, cut a piece from your lining that is 24 inches long by 22 inches wide. Get your pattern. We'll start with the lining as by the time we're done your exterior should be good to go. Place your pattern so that the part with the star is in the corner, like this (note which length of the fabric goes where):

I'm showing you the exterior in this photo, but the same thing applies to the lining.
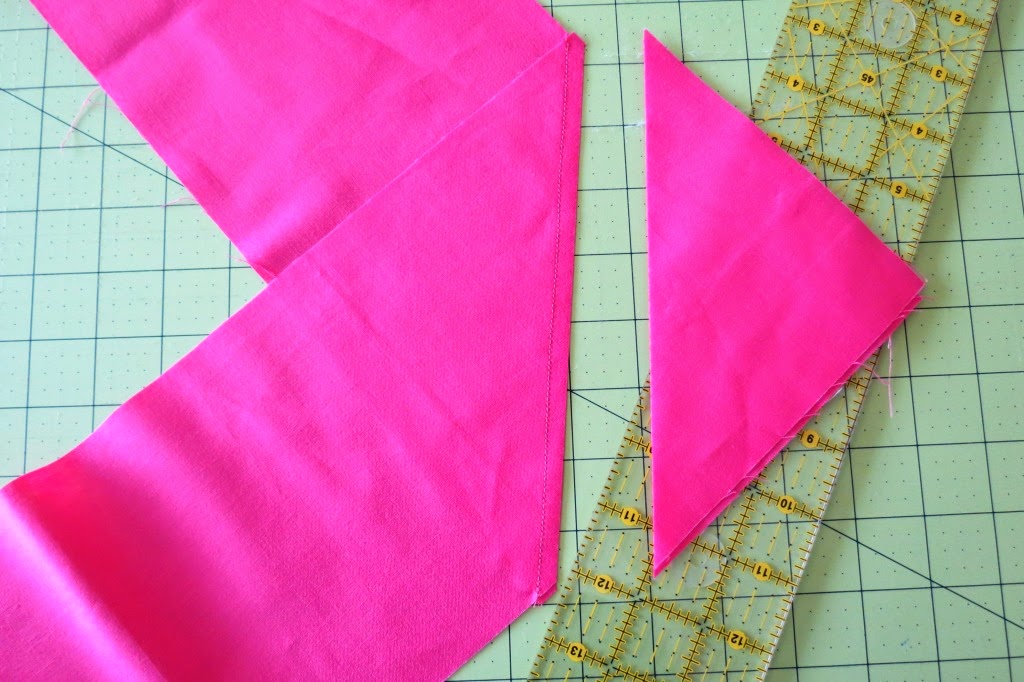
You can either cut around the paper, or trace around it and then cut it out. Place the pattern in the other three corners, turning or flipping as necessary so that the part where the star is ends up in the corner. That part is critical, so pay careful attention. When you're done, you'll have a piece that is shaped like this (but at this point in your lining fabric):

Take your exterior piece and trim off any bits of interfacing or fleece that may be peeking off the edges. Now place your pattern and cut it out just as you did for the lining. Set these pieces aside.
We're going to get going with the handles now. I need to note that my handles ended up being shorter than what I'm going to tell you as girl genius here didn't have the sense to check her fabric. So if you're looking at what you have and what I'm showing you and wondering why your handles look longer, that's why.
Whatever you're using for your straps (whether it's a contrast piece like I'm using, or your lining) cut two six-inch lengths of fabric from selvage to selvage. Then trim the selvages off.
This part is similar to making bias tape. Place the two strips right sides together, perpendicular to each other with a slight overlap. Draw a diagonal line from one corner to another like so:

Sew on that line, then trim a quarter inch from it (see photo just below), and press the seam open. You'll have a long piece of fabric now. Take that long piece and trim it so that it's 60 1/2 inches long.
We need to make a loop, so take one end and bring it over to the other end, repeating the steps above. Try not to get it twisted (pin and check first if you're new at this). It'll look like the below:

Draw your line, stitch, trim, and press. You should have one big loop of fabric. I've connected these this way to cut down on the bulk. Sewing the seams straight would have piled up the bulk over the next few steps; this way keeps it from doing that.

See? As we fold this up those seams will be spread out, minimizing the stress on your needle.
Now we press. Fold the loooooong edges in half and press, all the way around. Then fold the raw edges towards the center and press. All the way around.

Take your remaining bits of interfacing and fleece. Cut three 3-inch by 24-inch strips from each one (you should have enough to go around the loop). Unfold your loop, then fuse the interfacing right down the center (use your creases as your guide to center it). You'll need to overlap as we did when we were interfacing the main panel. When you get all the way around, trim the excess interfacing. Your overlap shouldn't be much more than a half-inch, if that.

Lay your fusible fleece down the center and fuse this as well. Do NOT overlap (way too much bulk will ensue). Simply butt the ends up next to each other. It'll be held in place by stitching. To fuse, I like to fold over the edges and press, then flip over the whole thing and press again to make it more secure.


When you have what looks like the above, fold that in half. It'll look like what you had before we went back and added in the interfacing.
** Please read the rest of this section before doing anything else. It'll make more sense if you see where we're going before you start the journey.
Now we need to make some markings, so you'll need some pins or a disappearing fabric marker. I don't have a picture for this step so I "drew" you a lovely graphic. Lay your handle loop totally flat with one side layered on top of the other, and folds at both ends:

Make a mark along the folds or place a pin through one layer (we don't want to pin the loop shut). Those are your mid-points. Match those up, like the below, and mark along the folds:

That there is a quick and easy way to make quarter marks on a loop of fabric. Pick a pair of midpoint markings, but note that those two marks can't be next to each other or this won't work. Mark 6 1/2 inches to each side of each of those two markings. You'll have a loop that has four sections marked off; two are 13 inches and two are 17 inches with those lengths alternating (13-17-13-17)

In this photo the pin is my midpoint, and the lines are the 6 1/2 inch markings I made.
Now we're going to sew only part of this handle. We're only going to sew those thirteen inch sections we just marked off to close up our handle. So trot on over to your sewing machine, and stitch pretty close to each edge (I like to go about 1/8 inch from each side).

I do my best to start and stop right on those lines.
Sewing up each edge is certainly enough, but I like more of a quilted look, so I added a few more lines of stitching. Do what you want with yours.


Ahhh, see how this is going now? Don't pin yet, I just wanted to give you the idea of how this is going to go down. I have a bit of a ruler obsession so I line up a few to do this, but if you're a normal person who doesn't have an abnormal amount of rulers you can make a few quick marks to do this part.


Pin that in place, and repeat with the other unsewn side of the handle. Then pin pin pin so that it doesn't go all crazy before we stitch it down. Trot back over to your sewing machine. Very carefully overlap one or two of your previous stitches, and now continue that stitching line until you reach the stitches at the other end, and carefully overlap a few stitches again. We're shooting for a nice continuous line here, so take your time. Then repeat for the other section.

We're sewing down our handle and closing that open edge at the same time.

One last step. I get a little anal retentive about my straps being secure, so right where our lines of stitching overlapped I like to sew a horizontal line so nothing tries to come loose at any point. So stitch those four lines right now, unless you have a devil-may-care attitude about such things :)

Phew. I know, that strap was a little crazy but it's super secure and eliminated the need for a bottom seam that we then would have to make super bulky by sewing our straps into it. Those kinds of things aren't always kind to needles, so we eliminated that issue by doing it this way.

What we've got so far. Please note that seam ripper is there for...scale...not because I used it or anything like that. Psh...come on.
OK, I think that's enough for the first day. We have our outside finished--it's cut out and interfaced with the handle sewn to it nice and securely. We have the lining cut out, and we'll be tackling that next. See you on Wednesday!

Such a cute bag and I LOVE that fabric! Thanks for the tutorial! Pinning!
ReplyDeleteGina @ Gina's Craft Corner
Those straps are really cool! I must try that method of making somewhere. =)
ReplyDeleteGreat start. I love your sew alongs, the photos make it all so very easy.
ReplyDeleteThanks for this tutorial Bethany. I have been busy babysitting the last 2 days, so I might not start this for a while, but I am saving the info.
ReplyDeleteReally must tackle the handles tomorrow, having sized the bag up, and with fabric coming in different widths here I need to think about the length of fabric I need! 13" for the handles section is very helpful info for working this out, then to catch up with the lining!!
ReplyDeletehi, I'm just getting started. I cut the lining with the pattern piece and wondered if you had any thoughts about using that as the pattern for cutting the exterior fabric? thanks
ReplyDeletePS my pellon interfacing was 22" wide :)
Oooo, lucky you on the interfacing. I don't know why they can't make it the same width as fabric. I guess that would make too much sense.
DeleteFor the pattern, yes, you can use that for the exterior, too, in the same way (with the bit with the star in the corner). Or, you can simply lay your lining piece on your exterior and use that as a guide (just be careful not to trim anything off of your lining fabric). Either method will work just fine.
bought more of the same pellon item number and new interfacing is now 20"!
Delete